
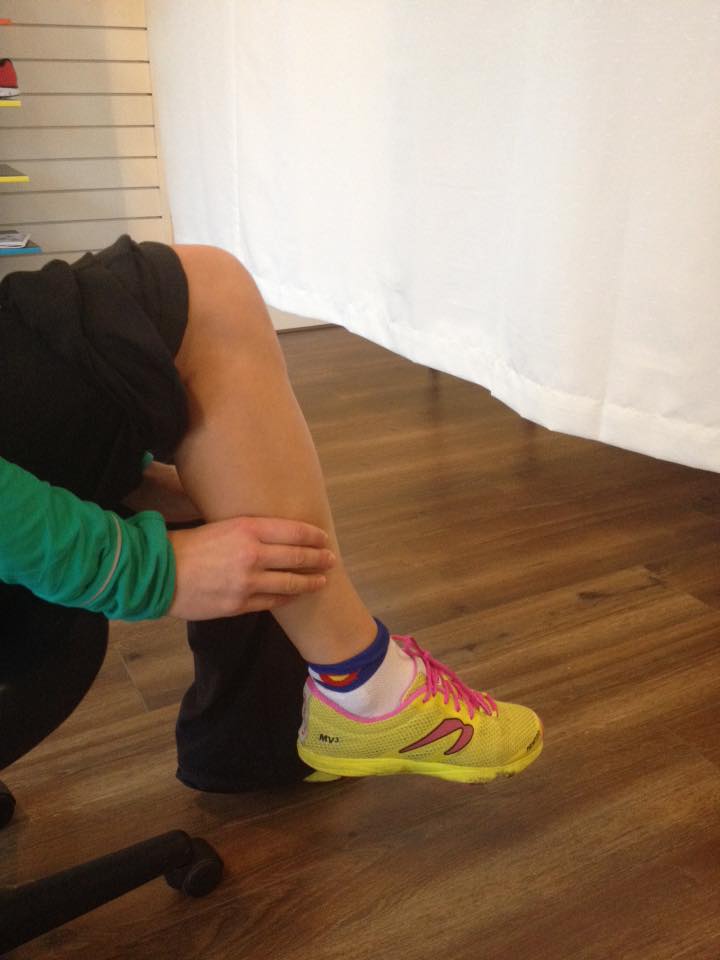
CKCP | Chartered Physiotherapists
Opening Hours : Monday to Friday - By Appointment
Contact : 087 4497955
A whooping 82% of runners get injured at some point in their running lives but unlike other sports such as GAA, soccer, rugby etc few runners practice the skill of running.
Yes, we grow up running, developing natural running form but unfortunately through a life of convenience, lots of sitting/driving and several other factors we develop imbalances throughout the body that affects our natural running form.
Everybody is different, no one has perfect running form but through drills we can all improve our running mechanics to become more efficient runners and minimize our risk of injury.
There are some really simple form drills that can be performed in 10 minutes or less at the end of your daily run. These drills have two benefits. They not only translate to better running but these drills also double as an “active stretch” for the muscles that may have become tight during a run.
There is an abundance of running form drills to choose from but most emphasize the aspects of good running form as discussed last week. In case you missed it and in a nutshell drills focus on developing, a compact arm swing, gentle mid foot strikes landing underneath your body, upright, relaxed posture with a slight lean of the body. Lastly quick leg turnover is advised at about 180 steps per minute. Aim to perform the following drills 3-5 times per week after your run to improve your skill of running.
Run in Place
This is a simple drill but it requires good form and you should be able to vary your step rate (cadence) from high to very high. With a slight lean from the ankles you will move forward slightly. Think about all the components of good form as listed above while performing 3 x 15 second intervals.
2. High knees
Running in place with high knees reinforces lifting with the hip while running as opposed to “pushing off” with the ankle and foot to begin a new stride. Again this is jogging in place while lifting your knees to a 90 deg angle. Similar to the last drill, with a slight lean from the ankles ,momentum gained during the drill will slowly move you forward. Engage your core to lower your leg back to the ground in a controlled manner and focus on a soft midfoot strike. Perform 10 high knee trusts each side.
3. Butt kicks
This drill focuses on the recovery phase of the running cycle. Focus on “flicking” your lower leg backward in a quick, pronounced but relaxed fashion, again contacting the ground under your center of mass. Perform 10 butt kicks per leg.
4.Donkey Kicks
This drill is performed in a stationary position. Standing in an athletic “ready” position on one leg, kick the other leg back behind you as if kicking back into a door. This drill requires good hip extension and once again teaches the body to contact the ground under your center of mass. Perform 10 kickbacks each leg.
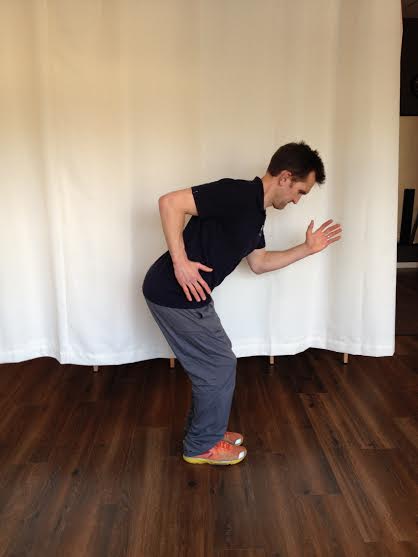
5. Arm pull backs
Practice proper arm motion by focusing on the posterior portion of the arm swing(when the arm swings behind the plane of the body). With a straight spine, slightly lean forward from the hips, from here alternate pushing your arms backward with the elbows at 90 deg. Repeat 10 times each arm. Remember , imagine your wrist and elbows are velcroed to your sides to minimize rotational forces and insure your arm swing is parallel to your body.
These are just a few simple drills you can incorporate to become a more skillful runner. Also to get a better understanding search any of the above drills on youtube for a video visual.
Running economy refers to optimizing as much speed as possible when running while using as little energy as possible. There are some simple cues to consider when out on a run to best use the elastic energy stored within the body to allow you to run with as little effort as possible.
Our hips, knees, ankles and feet work together with our muscles and connective tissue to “propel” us along very efficiently. This spring like system within the body is so effective that the energy cost of distance running is independent of speed. For instance it costs the same amount of calories to run 5 miles at 6 mins per mile pace versus 10 minutes per mile pace (This does not relate to sprinting).
Your running form develops over time, the key is to focus on the fundamentals first. Alignment refers to our posture. If you can maintain good alignment while remembering to breath and relax you will become a more efficient runner.
When considering your posture, your feet should be hip width apart with your feet facing forward (avoid a duck footed position). Knees should remain soft or “unlocked”. Lengthen your spine like someone is pulling you on a puppet string from the top of your head. Shoulder blades should be down and back against your ribcage. Imagine a line connecting hips over ankles, shoulders over hips and ears over shoulders. We acknowledge it is tough to grasp all these concepts at once so just focus on each segment and gradually progress your awareness over time to considering all cues.
Connect the dots into an imaginary line… ears, shoulders, hips, ankles and you are now ready to walk/run.
Gently lean forward from the ankles while keeping your imaginary line intact. As soon as you feel a gentle pull of momentum allow your body to move forward. Remembering to breath and remain relaxed while aligned with a little lean will improve your overall running efficiency. When running your feet should land softly, ideally underneath you. If your feet are landing too far ahead of you, you will be fighting yourself on every stride. Some experts compare it to “driving with the brakes on”. The knee of the landing leg should be soft so it can act as a shock absorber. Hands should be relaxed as if you are carrying something delicate in your hand. Imagine your wrists “velcroed” to your side as they follow a natural swing.
Lastly for the more experienced runner cadence is something to consider. Cadence refers to how many steps per minute you take. Optimal cadence is considered to be 180 steps per minute. Increased cadence reduces the overall forces of running and prevents over striding. A recent study found that optimal recoil time of shortening and lengthening of a tendon is 3 Hertz (three times per second). Three contacts per second for 60 seconds is 180 contacts per minute! So there is some sound physiological rationale to increase cadence to about 180 steps per minute.
Next time you are mid run, count your steps for 30 seconds and multiple x 2.
Slowly work towards increasing your cadence to boost your running efficiency and minimize risk of injury. Skipping is the ideal activity to train your body to increase cadence as it can can emphasize elastic recoil, as your heel settles on the ground before a new stride begins.
The general rule of thumb in the running world is to increase your miles by 10% per week. As healthcare professionals we agree with this slow progression and appreciate the fact that it will allow your body to gradually adapt to the stresses of increased activity and remain injury free.
However, the 10% rule is extremely general so we will take a closer look to see if this one size fits all model is the best for you.
No two bodies are the same hence some people will be able to tolerate more than the 10% increase in miles per week while others less. This leads to the question, am I being too conservative or too aggressive if I apply the 10% rule to my training plan?
For incidence, if you are a beginner it’s probably not advisable to increase your miles every week. Keeping your mileage consistent for 3-4 weeks until your are comfortable is wise before increasing your mileage even if it is just by 10%. The main goal for the beginner is to run consistently and allow the body to get use to running.
After a short break from running an intermediate runner may be able to bump up their miles relatively quickly to 30 miles per week without issue. You do not have to start from scratch after a 1-2 week break, you might find yourself increasing mileage by more than 20% without any problems.
More experienced runners can adapt the rule to suit their schedule. Sometimes adding 10% volume works but you may be able to add an extra day of running to the schedule and increase by 15-20% safely.
For advanced runners, they can usually increase their miles pretty quickly up to their cut off zone. Usually experienced runners can run injury free until they hit their zone and after this point injury potential drastically increases. After this point they may not be able to tolerate a 10% jump in miles per week and smaller increases are necessary by 5% or less. In addition, they will have to tolerate running comfortably at this volume for several weeks before adding more miles.
For someone who has been running for years but is now running more miles per week than ever before it pays to be conservative as this is unchartered territory. A long adjustment period is necessary when your body is logging more miles than ever before. If you are running anything over 50 miles per week, 3-4 weeks of adjustment are recommended before adding more miles.
Consistency is more important than mileage per week. A few extra miles a week here or there is insignificant in the grand scheme of developing as a runner. Ideally we should aim to run more consistently over the course of months and years,
So in a nutshell, listen to your body. You may find yourself moving up in mileage more or less than the 10% rule as its a general guideline only. Volume or miles is just one aspect to developing injury, other factors that need to be considered are pace, running speed, sprint training or other errors. Next week we will consider running form and simple cues to utilize during your run to maximize running efficiency.
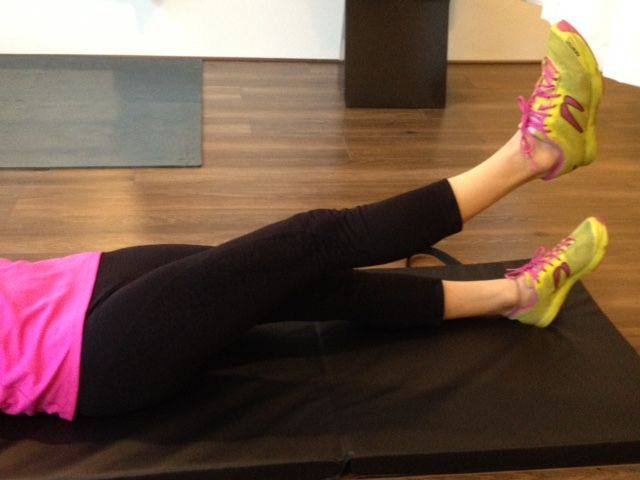
There are a few simple self assessment tests you can perform to check your body’s ability to stabilize itself adequately during running. Several common injuries originate from weakness in the hip muscles and core region.
These three easy tests will help identify if you are at increased risk for injury.
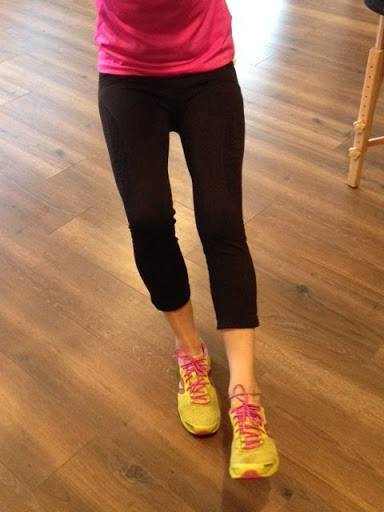
Single Leg Squat Test
In front of a mirror gently lower into a mini squat position on the right leg only. Then repeat on left leg. Identify differences side to side. Pay particular attention to the position of your knee. If it “dives” inward toward midline this is a sign of weak hips or “inactive” glute muscles.
Leg Raise Test
Lie on your back with both legs out and hands on your hips. Raise one leg 6 inches off the floor, Your pelvis should stay stationary and your back should not arch. Repeat with other leg. Again assess your ability to maintain a stable pelvis while raising your leg.
Observation/Gait
Have your friend or running buddy record a short video at the beginning and then again at the end of your run. Again, compare differences, has fatigue set in and altered your movement? There are some nice apps available such as Hudl Technique so as you can slow down the video and take a closer look at your form. Does your hip “drop” more on the right side v’s the left side? Is your gait significantly different by the end of the run. All of these factors indicate increased risk of injury. If there is a notable difference by the end of your run some walk breaks may be wise to allow your body to recover and not compensate to a faulty pattern once it gets tired.
In addition to performing the above tests your risk for injury increases with the following;
Female; women tend to lack strength and stability in comparison to males. The reasons for this are not fully understood but the pelvic/hip alignment of a women is different to a man and this maybe an underlying cause women have to be more conscious of their running form.
Desk job; Sitting all day tends to lead to muscle imbalance. Muscles in front (hip flexors) become tight while muscles on the backside (glutes) tend to shut down. Try standing up every 15-20 minutes to allow tissue to lengthen and activate intermittently throughout the day or do your work in a standing position.
Previous history of injury
Past injuries may play a role in placing you in the increased risk for injury category due to compensation and alteration of normal gait pattern.
Increasing mileage quickly.
Slight gait abnormalities and muscle imbalances may not affect the body if you are running short distances a couple of times a week. However if you ramp up your milage these small weaknesses can turn into injury when you increase the miles.
This leads into next week’s topic. Join us as we provide some tips to allow you to increase your mileage safely.
Simple ways to maximize recovery between workouts and runs.
There are several things you can do at home to aid with recovery between runs so you become less sore and can maximize each day of your training plan.
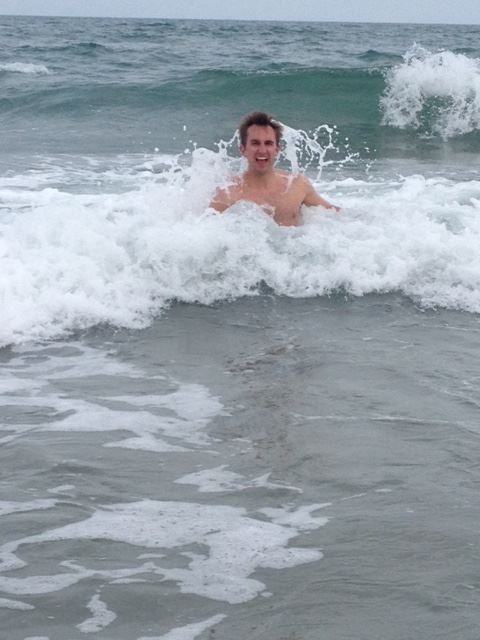
First off, cold thermogenesis is bodily exposure to cold temperatures. It comes in a multitude of forms, one of the simplest forms is cold water immersion. Benefits of cold thermogenesis include decreased level of inflammation throughout the body, an enhanced immune system, and increased longevity of bodily cells. Between work outs a dip in the sea can really aid the recovery process, leading to less chance of injury and breakdown. If you are not ready for that level of cold just yet, try turning your shower to cold for the last 2 minutes or so and concentrate the flow of water onto your legs to stimulate a milder version of cold thermogenesis!
Compression garments/stockings
The use of compression stockings are thought to aid with blood flow to the muscles helping with restoring muscle glycogen stores and clear metabolic waste from the area after a tough run. Some runners like to wear compression gear while running and racing as well as throughout their day. Wearing garments during your run can lead to less muscle damage due to the additional support to the tissue while you run minimizing the “bouncing” forces placed on the muscles while running. If you find compression gear annoying to run in, at least try wearing the garments at other times during your normal daily routine.
Epsom Salt Bath
Long used as a relaxation method Epsom salt baths can help with decreasing muscle soreness. The magnesium sulfate present in Epsom salts displaces the accumulation of calcium ions in muscle tissue during a workout in turn decreasing muscle soreness and enhances bodily relaxation. A nice alternative to cold thermogenesis, treat yourself and give this a go but be aware of a slippery bathtub!
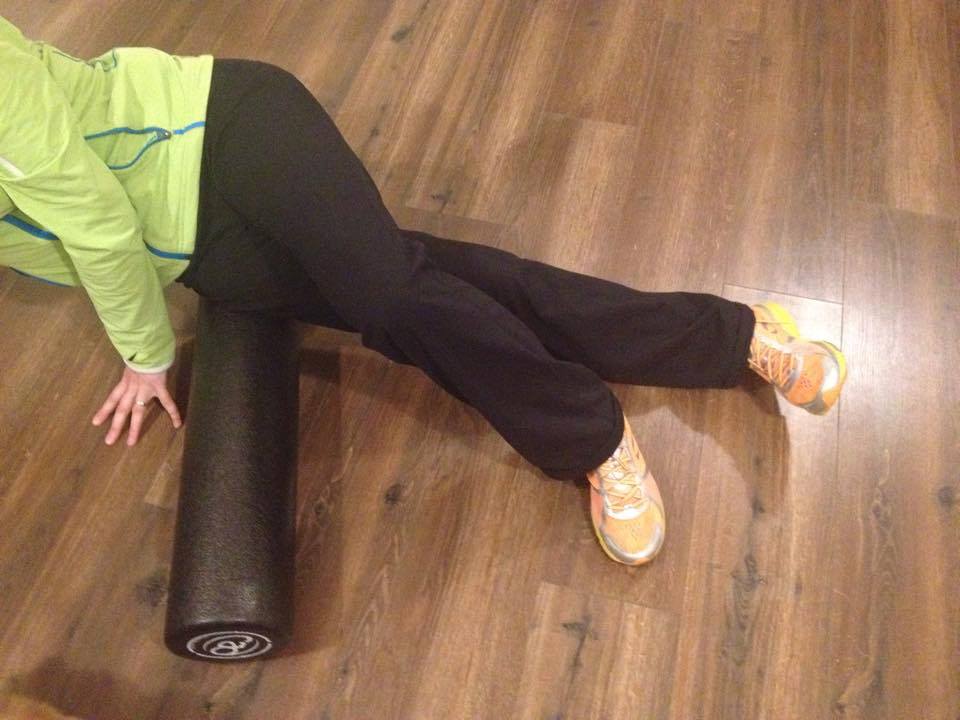
Foam roller
With increased activity you are likely to create “knots” or trigger points within your muscles. If not addressed these “knots” or tightness within the muscle will lead to decreased circulation, pain inflammation, loss of mobility and muscle weakness. Addressing trigger points before they become a long term issue is a key component to recovery. As explained last week in a prehabilitation article, using your foam roller to apply deep pressure to the trigger points will allow the muscle fiber to reset restoring normal tissue resting length.
Finally ……Sleep. The body needs sleep to recovery both physically and mentally. Without 7-9 hours sleep per night the body’s ability to thermoregulate is decreased, perceived exertion increases in addition to cardiac effort.Join us next week as we discuss simple self assessment tests to identify your area of weakness
A key to staying healthy and on the run is to invest in some basic tools that if used consistently can keep you out of the doctors office!
Deep tissue work with the use of a foam roller will allow you to address any areas of tissue tightness or “knots” that may develop throughout your training program. Medically these “knots” are known as trigger points. Trigger points can lead to decreased blood flow within the muscle fiber and subsequent loss of mobility and muscle strength.
As a tight muscle becomes weak, this muscle tends to “tighten” even more to try to provide stability to an area in turn creating more trigger points (knots) and feeds a vicious cycle of injury. Addressing trigger points before they become a long term issue is a key component of staying healthy.
Using your foam roller you can apply your body weight (to your tolerance) to the large muscle groups in your legs rolling the tissue slowly while applying deep pressure. This deep pressure will “break up” the trigger points and will allow the muscle fiber to reset restoring normal tissue resting length. This will in turn restore normal blood and lymph flow to the area.
Foam rolling the iliotibial bands is a favorite of ours. (thick fibrous tissue originating from your hip musculature and inserting just below your knee). Rolling is slow and deliberate. Find a tender area, apply 1-2 minutes of pressure with the foam roller before rolling onto the next tender point.
You can also use a hurling ball or tennis ball to address specific areas of tightness. Find the tender spot , apply pressure to this area with the use of the ball and the tissue will gradually relax around the ball over 1-2 minutes. The ball is a great way to address tissue restriction on the sole of your foot.
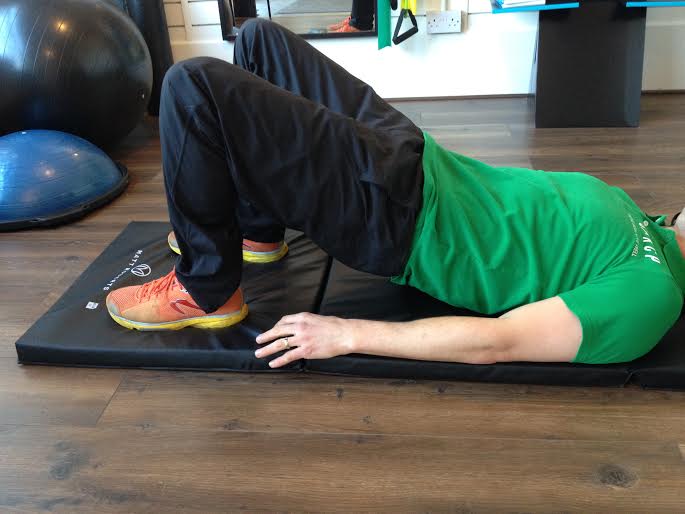
Engaging your hip muscles correctly while you run is important to staying healthy.
A simple exercise to perform is the bridge exercise.
While on your back,knees bent, gentlly clench your buttock muscles together then lift your bottom off the floor. Be careful not to arch your back and work towards holding the bridge position for 30 seconds to 1 minute repeating 3-5 times. If you have never performed this exercise before start with 5-10 seconds hold. Remember to breath! Also, if you feel the exercise anywhere other than your buttock muscles you are not activating your glute muscles correctly. Come back down and start again resetting your glute muscles with a gentle buttocks clench prior to raising your hips off the the floor. If you have an exercise ball you can incorporate this into the exercise for additional challenge. Since the training program is ramping up check in with us next week as we discuss simple things you can do to aid your recovery between runs and workouts.
We consistently receive emails from new and less experienced runners who have set a goal to start running or to complete a targeted race such as the Hope & Dream Foundation 10K/10 miler. Therefore this week we have compiled a beginners guide for all those who are new to the sport.
Many “non runners” may question “is running good for you”? They may query why you are choosing to undertake such a task. Contrary to popular belief running may actually prevent the development of osteoarthritis, joint degeneration and subsequent joint replacements. The body has been shown to respond to the impact of moderate running by thickening cartilage and building bone mineral density. Other well documented benefits of running include reducing risk of stroke, heart disease, diabetes and high cholesterol.
Now that you have decided to commit to your first 10K it’s time to invest in a good pair of shoes. Avoid buying discounted running shoes as shoes can break down sitting in the box over extended periods.
A big mistake for new runners and even more seasoned runners is to do too much too soon or too much too fast. Begin by alternating between running and walking. Walk breaks prevent you from fatiguing too fast. If fatigue sets in and you continue to grind through your run your technique and form will change leading to tissue breakdown and injury. Gradually decrease your walk breaks and increase your sustained running time.
As a beginner just walk & run, no interval training, avoid injuries by taking things slowly. You should not experience serious discomfort!
A popular query we have received relates to treadmill running and the difference between treadmill running and road running. Treadmill running tends to feel more difficulty as it requires additional balance and coordination to stay upright and running on the machine. However the treadmill doesn’t give you as much of a workout as running outdoors on varied surfaces and through the elements of wind and rain. In addition treadmills don’t allow you to learn to pace yourself. So even if the bulk of your training is done indoors on the treadmill be sure to take a few of your runs outdoors prior to race day so you have the opportunity to learn to pace yourself.
A little muscle soreness is normal a day or two after running initially but if the pain persists > 48 hours it can be a red flag. Learn to differentiate from muscle soreness and joint pain. Joint pain and severe muscle soreness indicates a need for rest and consider seeing a healthcare professional. It might mean you need to re evaluate or adjust your current running routine.
Check in with us next week as we discuss importance of prehabilitation exercise to prevent injury. We will discuss how easy it is to assemble your own prehabilitation tool kit at home that will allow you to stay healthy and on the road.
Self trigger point release
Why rest is sometimes not enough to address injury and allow return to play.
With injury many people cut back on the volume of their activity level to allow the tissue or injury to rest and heal. Unfortunately too often, after resolution of symptoms and on return to their chosen sport or activity, symptoms and pain quickly return.
The limitation with rest alone, yes it allows the tissue to heal but usually the injured tissues heal in a very disorganized fashion and the tissue remains weaker than that of pre injury levels. We need to help the body align the injured tissue in and strong organized parallel direction. One of the best ways to restore tissue mechanics of an injury site is to get in and “free up the tissue”.
You can do this manually with your hands, find the injured area where the tissue feels “knotted” or “bound down” and press down into the stiff and sore spot. With this you can also move the joint associated with the muscle group. Apply pressure to forearm muscles while moving your wrist up and down. Similarly, apply pressure with your thumbs to your calf muscles while pumping your ankle up and down. Do this for 2-5 minutes daily until tissue feels supple and pain free once again. Now you can slowly attempt a return to previous activity level.
Large-scale scientific studies have not found any connection between injury rates and how much of your running is performed on hard vs. soft surfaces. However, there are significant amounts of studies showing that runners who spend time on trials have fewer running injuries than runner s that only run on the road. Flat surfaces such as roads, running tracks or treadmills force us into repetitive movements, which in turn cause the repetition of biomechanical imperfections.
Different surfaces allow for various running techniques based on hardness, degree of unevenness and differences in surface heights. Our bodies subconsciously perform different strategies for foot and ankle stabilization and contact patterns which allow us to refine our running skills. Allowing for small variations will help change the forces that are involved during running which can help decrease injury rates. The variation of biomechanical components used when running on natural irregular surfaces brings about a variety of tissue stresses which reduces the risk of overuse injuries.
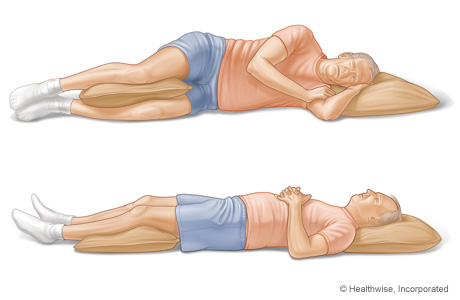
Proper sleeping positions can help keep your back healthy even if you don’t have back pain. Try to sleep in a neutral position without too much arch in your lower back. This helps take pressure off your spine.
Two positions that can help with this:
1. Sleeping on your side with a pillow placed between your knees to keep your hips and pelvis level. Try to keep your top leg from falling over your bottom leg.
2. When sleeping on your back, place a folded pillow under your knees.
Avoid sleeping on your stomach as well as only one side.
We use the Functional Movement Screen as a quick screen to assess an individual’s quality of movement that is directly related to their injury risk.
The FMS is a series of seven simple movement tests that assess an individual’s movement pattern and three clearing tests to rule out pain. The movement test identifies an individual’s limitations or right to left sided asymmetries that may place the individual at higher risk for injury.
The FMS screen gives the individual a score depending on their performance on the movement tests. The test is scored out of 21, 21 identifying individuals that move without flaw or weakness (unheard of!). A cut off score of 14 is used to identify highly injury prone individuals secondary to their movement limitations.
Once the screen is performed and an individual weaknesses are identified corrective exercise are prescribed to address movement dysfunction and minimize risk of injury.
What is Trigger Point Dry Needling (also known as Intramuscular Manual Therapy)?
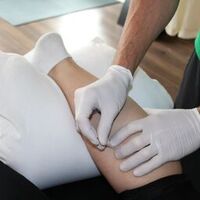
Trigger Point Dry Needling involves the insertion of a very fine needle (a 10th of a size of that of a regular needle used to draw blood) into a “tight” muscle band, often referred to as a “knot”. Medically these knots are referred to as trigger points, hence the name Trigger Point Dry Needling.
When the needle is inserted into a healthy muscle supplied by a healthy nerve it is painless. However when the needle hits a “knot” or taut muscle band a cramping sensation can be felt. The technique takes minutes and needles are removed almost immediately. You can feel immediate relief or it may take a day or two for the soreness of the needles to wear off. This is usually followed by less pain, better movement and a gradual return to function.
Dry needling is a good adjunct treatment to address chronic pain and muscle tightness. When nerves become irritated or damaged, the muscles they control can become weak and painful. Inserting tiny needles into the muscle most affected by the nerve mechanically “breaks up” the tight muscle bands or “knots”. The mechanical effect of the needle allows the muscle to begin to function normally again resetting the chemical environment of the affected region, releasing repair factors that create a normal relationship between the muscle and nerve again.
Finally, although the technique uses a similar needle to acupuncture, the technique is very different than that of acupuncture and is a scientifically proven method for treating injury. In addition, we always recommend our patients to follow up their dry needling sessions with exercises to reinforce the positive effects of the dry needling procedure.
Having worked with patient’s for several years and even completing training in the fitting of orthotics, the last few years we have both steered clear of prescribing orthotics as a remedy for foot, knee, hip and back pain.
Contrary to popular conventional belief the arch of the foot is not a weight bearing surface, therefore there is absolutely no need to place an artificial support into a shoe to build up the arch so it can bear weight and take contact. The arch of the foot is made up of three arches that work together similar to that of a suspension bridge. Placing your foot in a motion control shoe or with additional support of an orthotic inhibits the natural technologies of the foot that we were born with.
Generally we see with some dedication to strengthening work and gradual exposure to minimalist flat shoes, arches and foot alignment can be restored to that of a barefoot tribe.
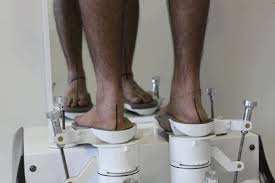
There are a tiny percentage of people that have a structural poor alignment which may require a “corrective orthotic” which can be identified with a simple weight bearing test.
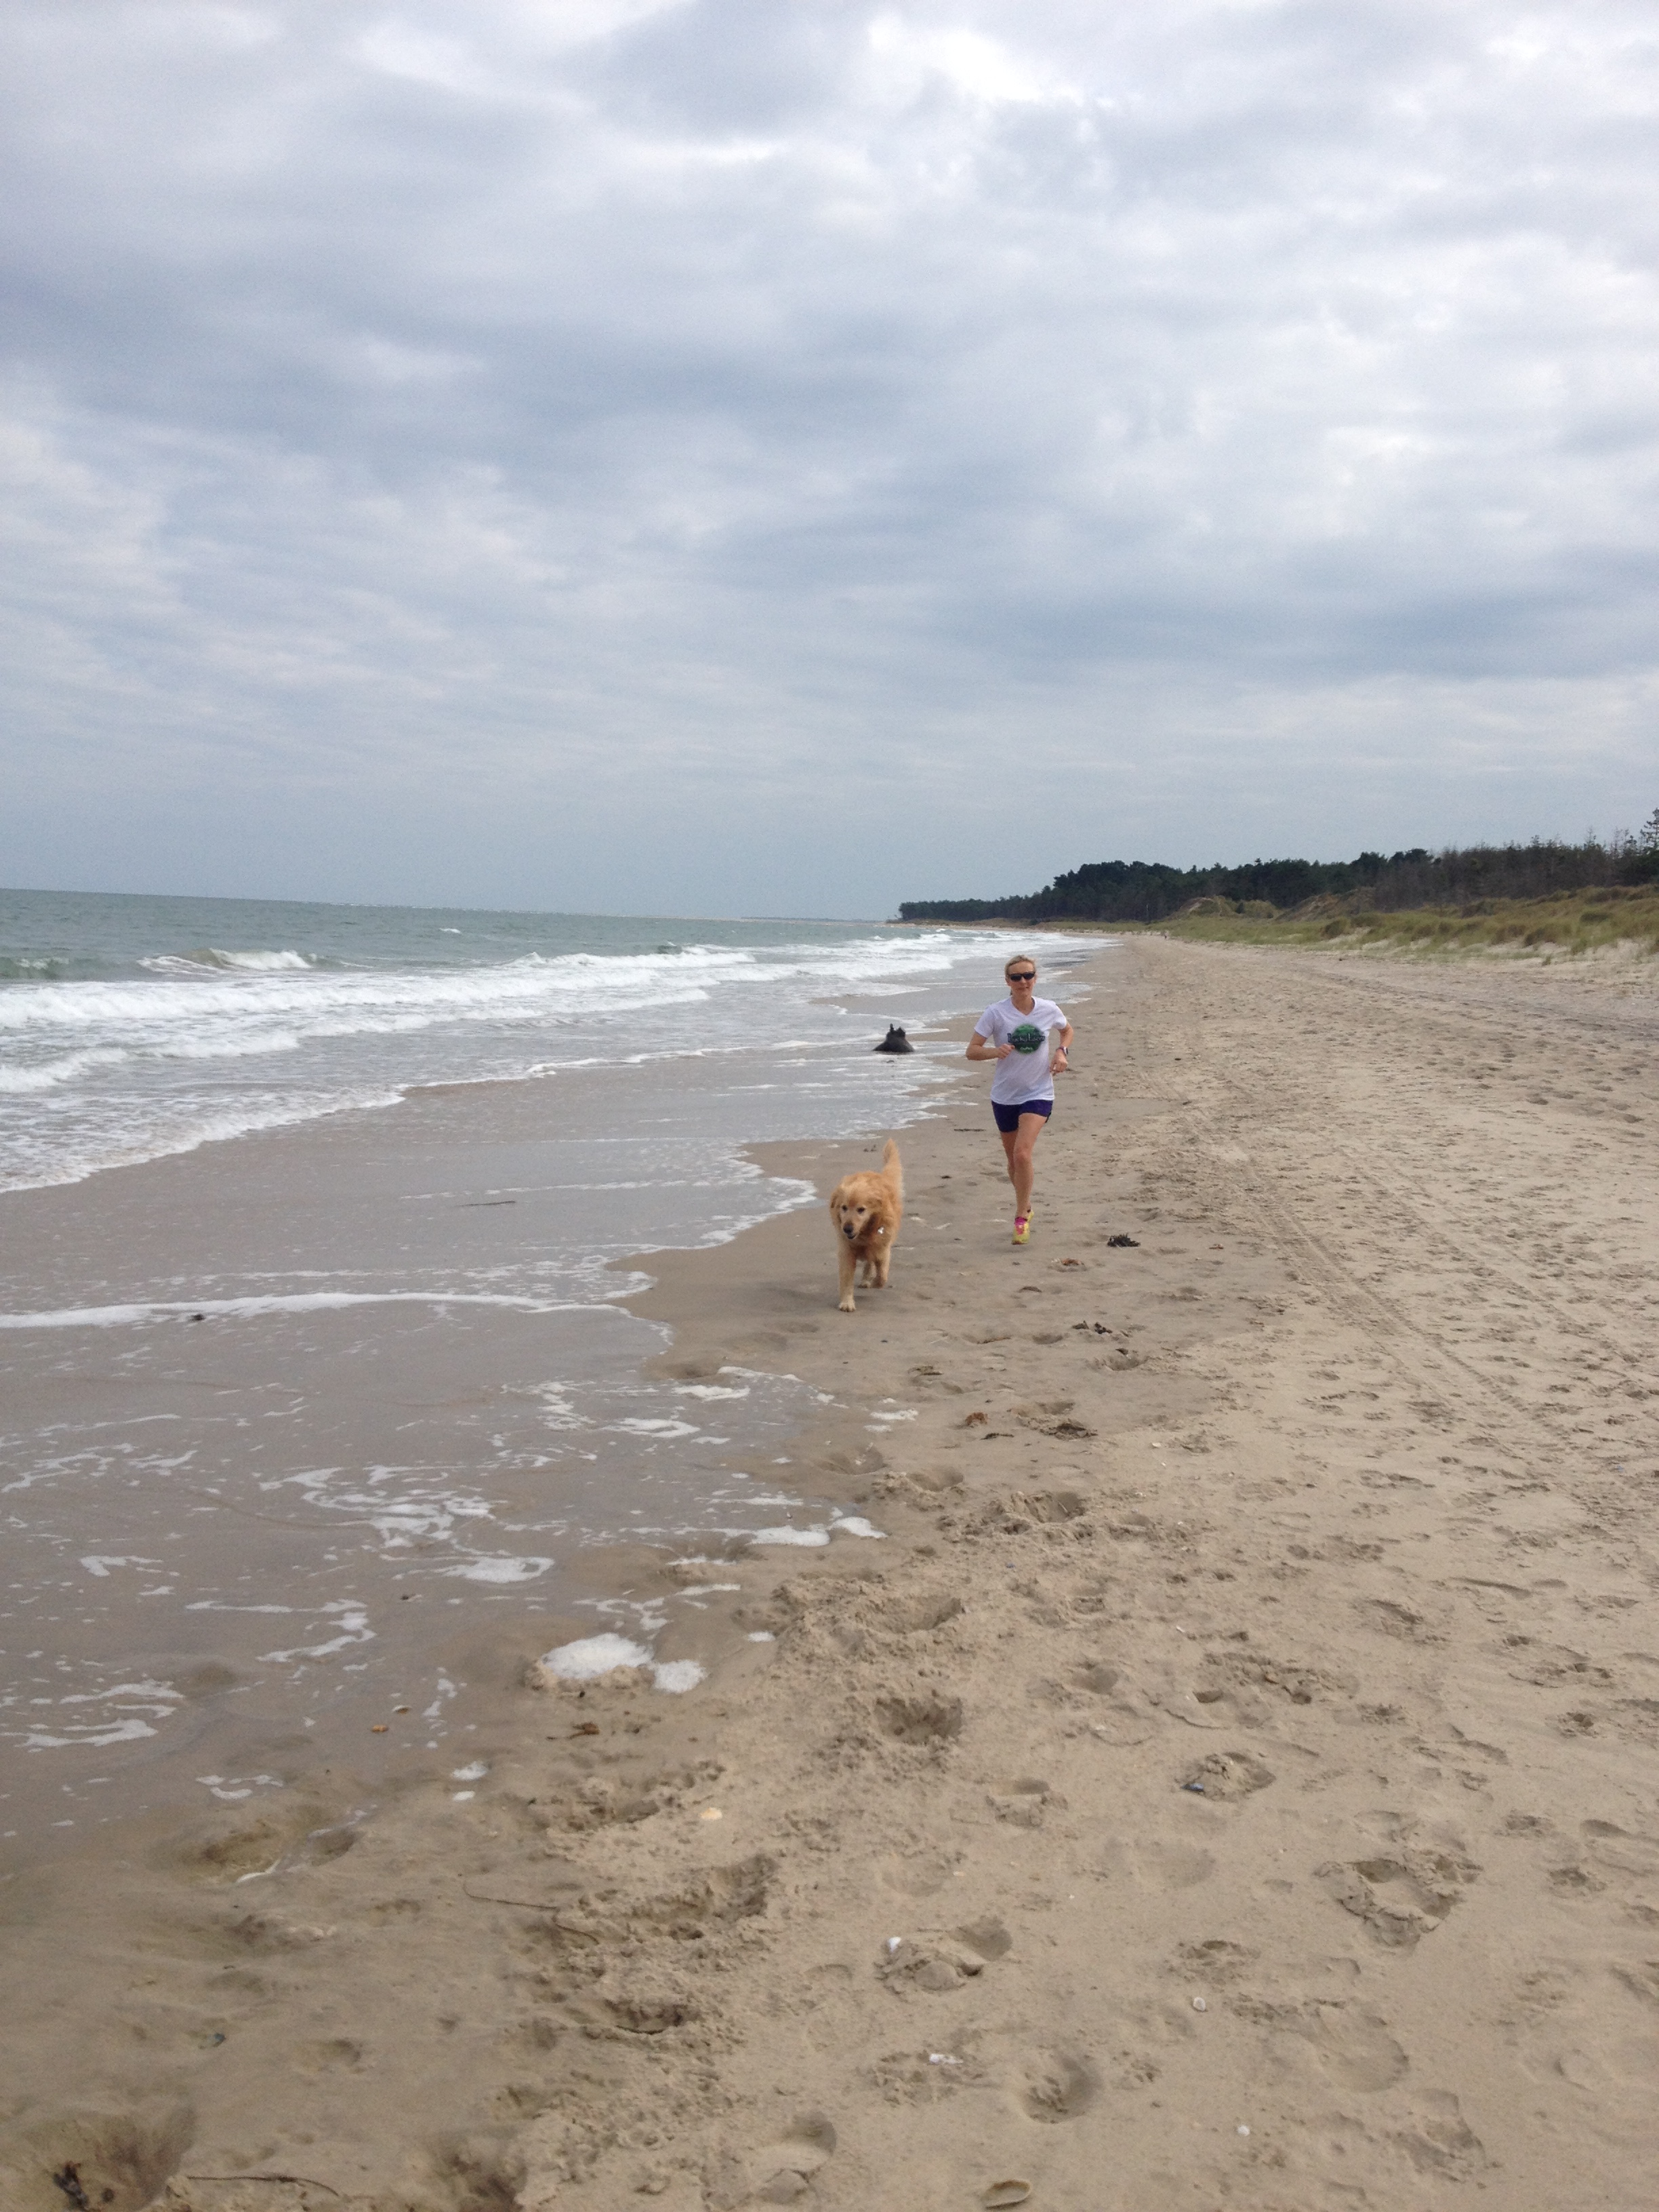
A little more about the other member of our team.
Champ, our 6 year old Golden Retriever has worked as a therapy dog with Bryan in his old clinic in America for the past 5 years. Patients found the presence of Champ, his mellow temperament and friendly tail wag a true comfort during their physiotherapy trips to Bryan. There is an increasing use of therapy dogs (different to service animals) in America as they visit hospitals, schools, rehabilitation centers and nursing homes to provide warmth and companionship for people especially during tough times. Evidence suggests that simply petting an animal can help reduce blood pressure and in return stress levels.
Interacting the use of pets in medical settings dates back to over 150 years, but it was not until the 70s that research began to back up the claims of pets making people healthier and providing a level of social support.
Champ received such positive feedback in his old clinic we are excited to have him continue to work in Ireland and for our Irish patients to experience his calming effects.
We are happy to work around people with dog allergies as Champ always enjoys a day off.

Rehab Dog
Cold thermogenesis is simply bodily exposure to cold temperatures. It comes in a multitude of forms, one of the simplest forms is cold water immersion. Benefits of cold thermogenesis include decreased level of inflammation throughout the body, an enhanced immune system, and increased longevity of bodily cells. Between work outs a dip in the sea can really aid the recovery process, leading to less chance of injury and breakdown.
However If carrying an injury ice and cold thermogenesis can control excessive swelling to the injured area. In addition cold/ice slows nerve conduction velocity in the region where applied making it a highly effective pain reliever. Muscles will be less likely to spasm and remain in a relaxed state. This will maximize range of motion, allow for continued use of the region minimizing muscle atrophy and will allow return to normal functioning and training faster.
The use of cold and ice has long been used in medicine, and there is evidence dating back to the Middle Ages to suggest that ice was used as a presurgical anesthetic. Therefore with its long history in medicine we believe ice is the best “free” medication out there. It is inexpensive, readily available and easy to apply. Injured or in the interest of overall health and recovery…get submerging!
Sitting is the new smoking and it will kill over a life time!
This is why we advise all our patients to sit no longer than 20 to 25 minutes at any one time. We understand that in an office job this seems like an almost impossible goal to accomplish but standing up for even 30 seconds will allow your postural muscles to reset and support you as they should once you sit back down. Unfortunately sitting for long periods tends to shut off our important muscular support system allowing enormous stresses through our skeletal system, in particular the spine. We all have to be consciously aware of activating and recruiting our muscles to the best of our abilities. Gentle reverse shoulder rolls and abdominal bracing (drawing your belling button to your spine maneuver) can help cue important muscle activation patterns.
Set a timer on your phone to remind you to at least stand up frequently and even better take ten or fifteen steps. Another helpful idea for sitting postures and to encourage postural awareness is sitting with a pillow length ways in your desk chair. The pillow should contact all the way up your back and this contact will give you feedback if you are losing postural positioning and beginning to bend forward and excessively flexing your spine. Sitting with an exercise ball intermittently throughout the day is also another good way to engage muscles as you need inherently stabilize to remain upright on the ball.